Section 9.1 Initial Setup
For starters, let’s get the CPX to print button presses. The code I’m using is shown below and can also be found on Github[33].
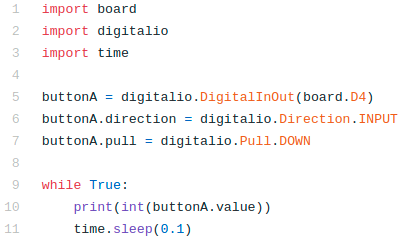
The code is pretty similar to what I had in the past. I import board, digitalio, and time. I create a buttonA object using the digitalio library to record button presses. I then enter into a while loop print the buttonA.value. The difference here is that I use the int() function to convert the buttonA.value to an integer. The reason why I do this is because buttonA.value is a boolean. It is either True or False. An integer though is a number and thus a value of False is 0 and True is 1. If you open the serial monitor and push the A button down a few times you’ll see some zeros and 1’s.
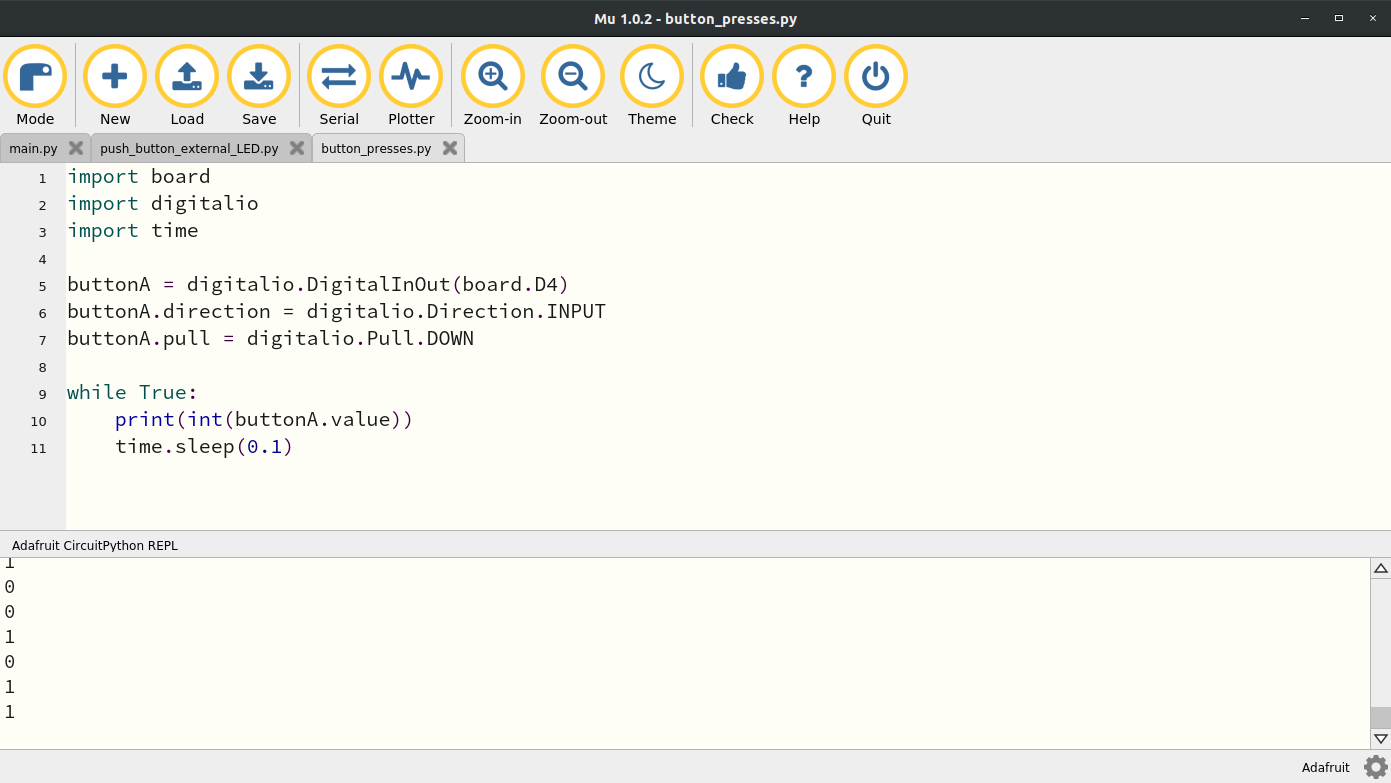
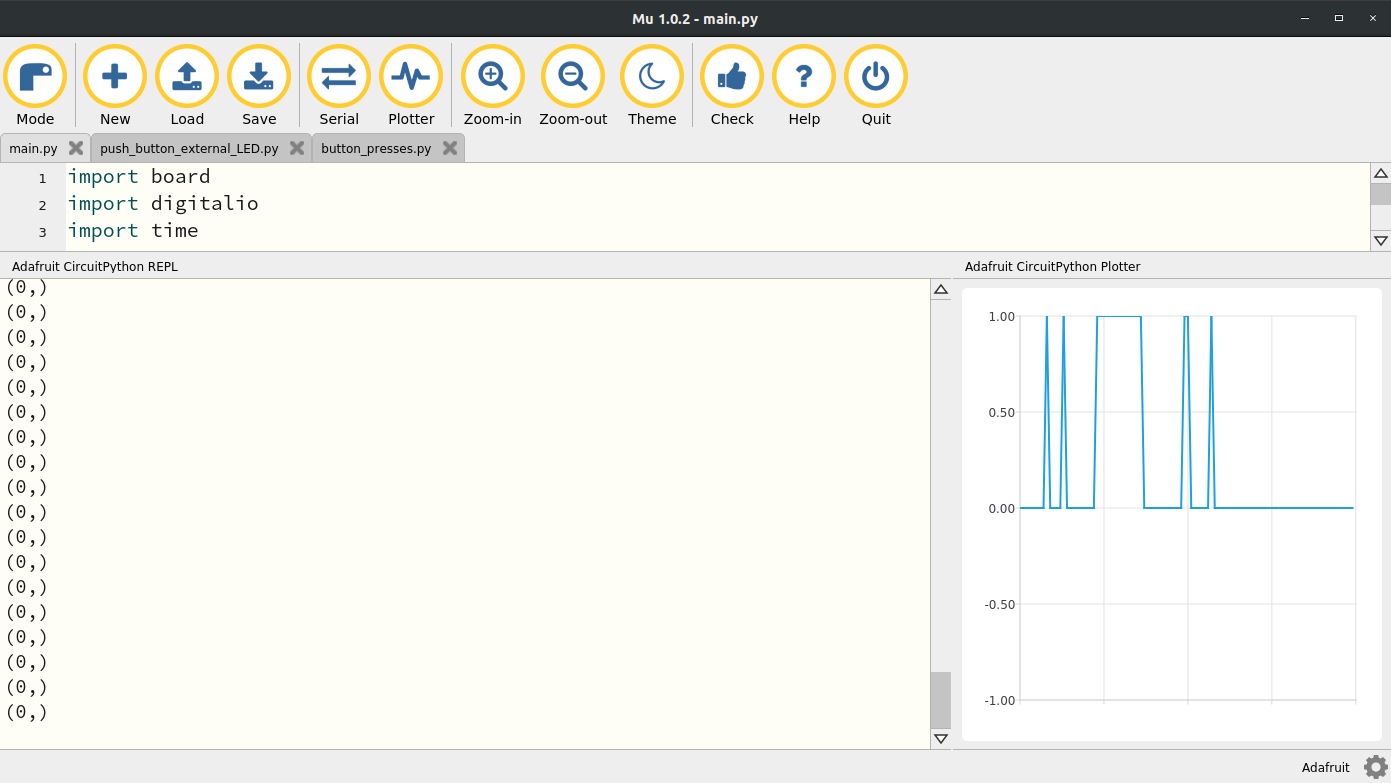
Mu also has a really neat builtin plotter. You’ll see next to the Serial button there is a button called Plotter. If you click that button now nothing will pop up on the screen. Unfortunately in order to plot using the Plotter you need to modify the print() statement to this:
print((int(buttonA.value),))
Notice the extra parentheses and the comma. Now if you click Plotter you’ll see something like this. You’ll notice that the print statement now has commas in it and the Plotter is recording button presses.
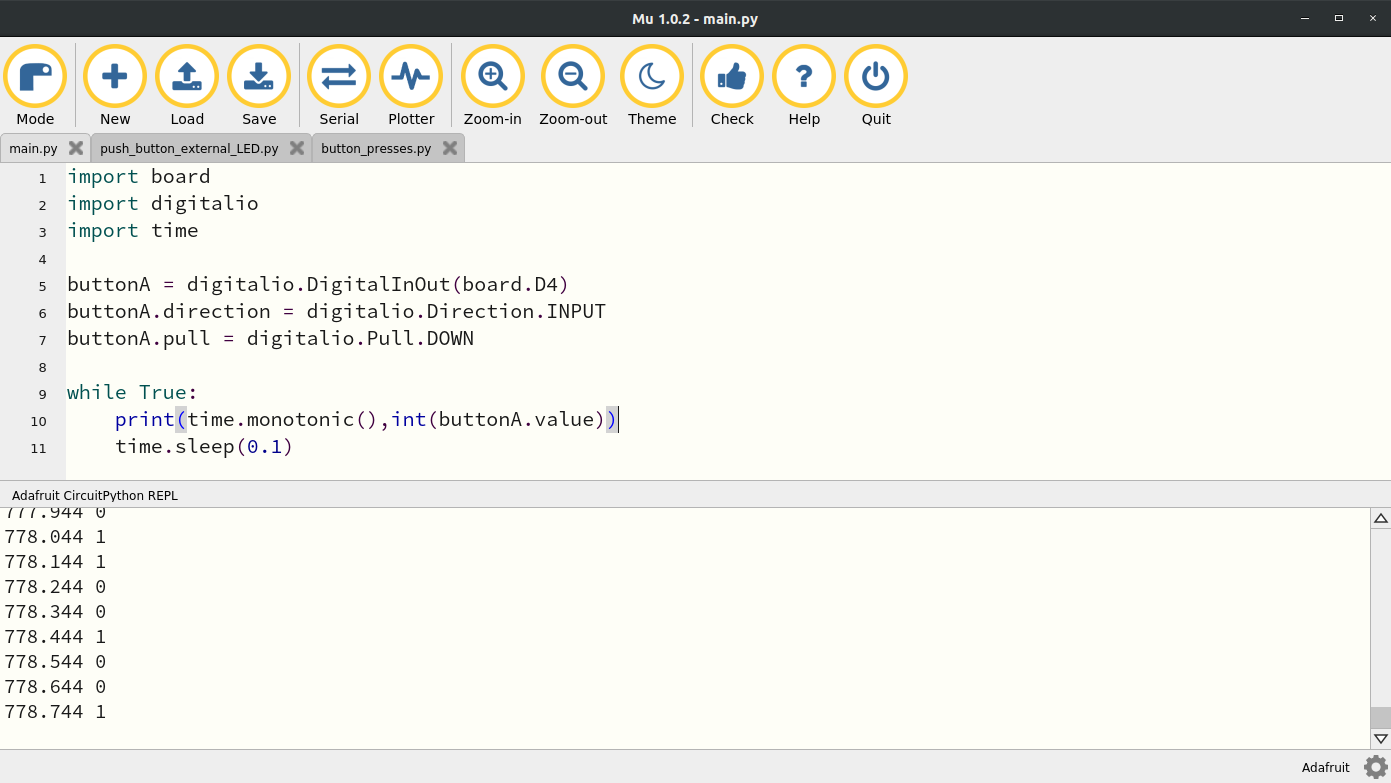
The problem with this is we still can’t save the recorded data anywhere. Before we get into saving data let’s first edit the print statement again to get rid of the Plotter by removing the extra parentheses and add time.monotonic() that way we can keep track of when a button was pressed. My print statement looks like this now:
print(time.monotonic(),int(buttonA.value))
Looking at the serial monitor now you’ll see that time is being printed alongside the button presses.
Now we are in a position where we can record some data and save it to our computer. There are 4 ways to record data. I call the first, Method1 and you basically just copy and paste from the serial monitor, Method2 where you have the CPX/CPB type data into a spreadsheet and Method3 where you log data internally onto the CPX/CPB itself. The 4th method called Method4 utilizes the Bluetooth Module. Since that has it’s own issues there is a completely separate section on how to explain Bluetooth (See Chapter 10). Note you can only do Bluetooth if you have the Circuit Playground Bluefruit (CPB).
