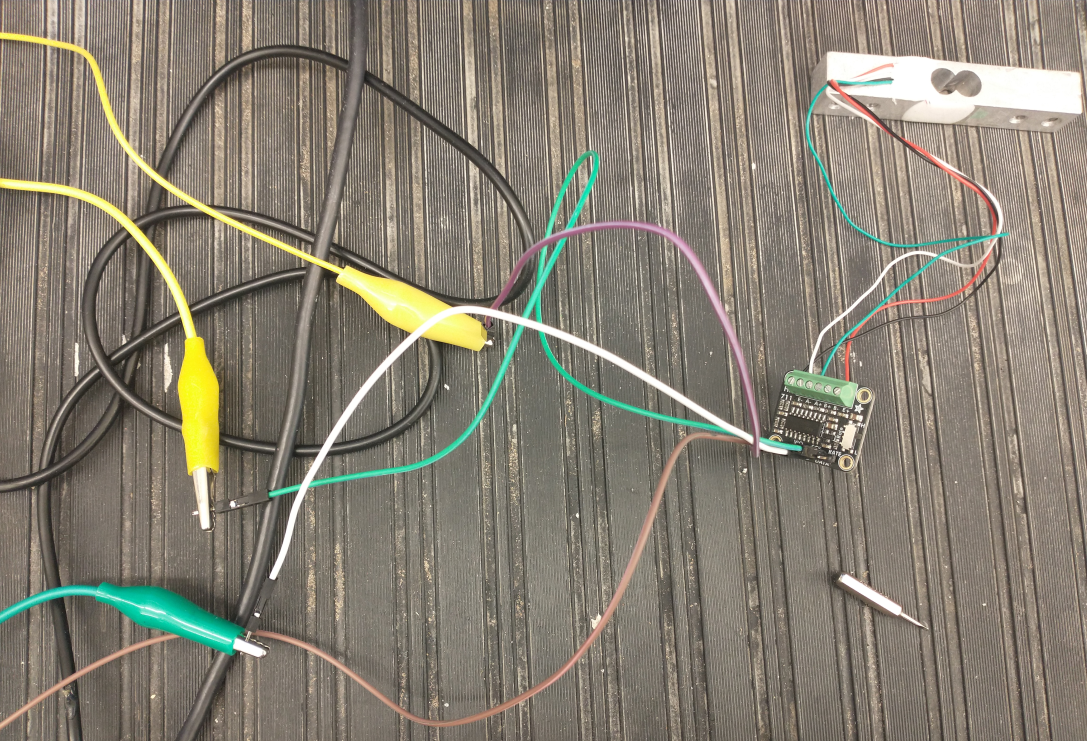
For the CPX/CPB the strain gauge and amplifier are the same but you will be using 4 alligator clips as shown in the photo below. Although very non-standard, there are two yellow alligator clips. The first yellow alligator clip is connected to 3.3V and is then connected to a purple male-male wire which is then connected to the VIN pin on the amplifier. The white alligator clip is connected to the GND pin which is connected to a brown male-male wire connected to the GND pin on the amplifier. The green alligator clip is connected to the A2 pin connected to an white male-male wire connected to the SCK pin on the amplifier. Finally, the second yellow alligator clip is connected to the A1 pin connected to a green male-male wire connected to the DATA pin on the amplifier.
This isn’t as straightforward because the amplifier in the parts list has an SCK and DATA line instead of SDA/SCL. The good news is that it still uses digital output so the CPX/CPB can read it. So not quite I2C but still digital communication.
Once you have the circuit wired there are no extra modules to install since we’re just going to be using the digitalio library. The example code on Github reads and calibrates the load cell data and converts it to kg for ease of use. Note that kg is not a unit of weight but since we’re on Earth we’re assuming that we’re under 1g acceleration and thus kg can be used as weight even though it’s actually a mass.
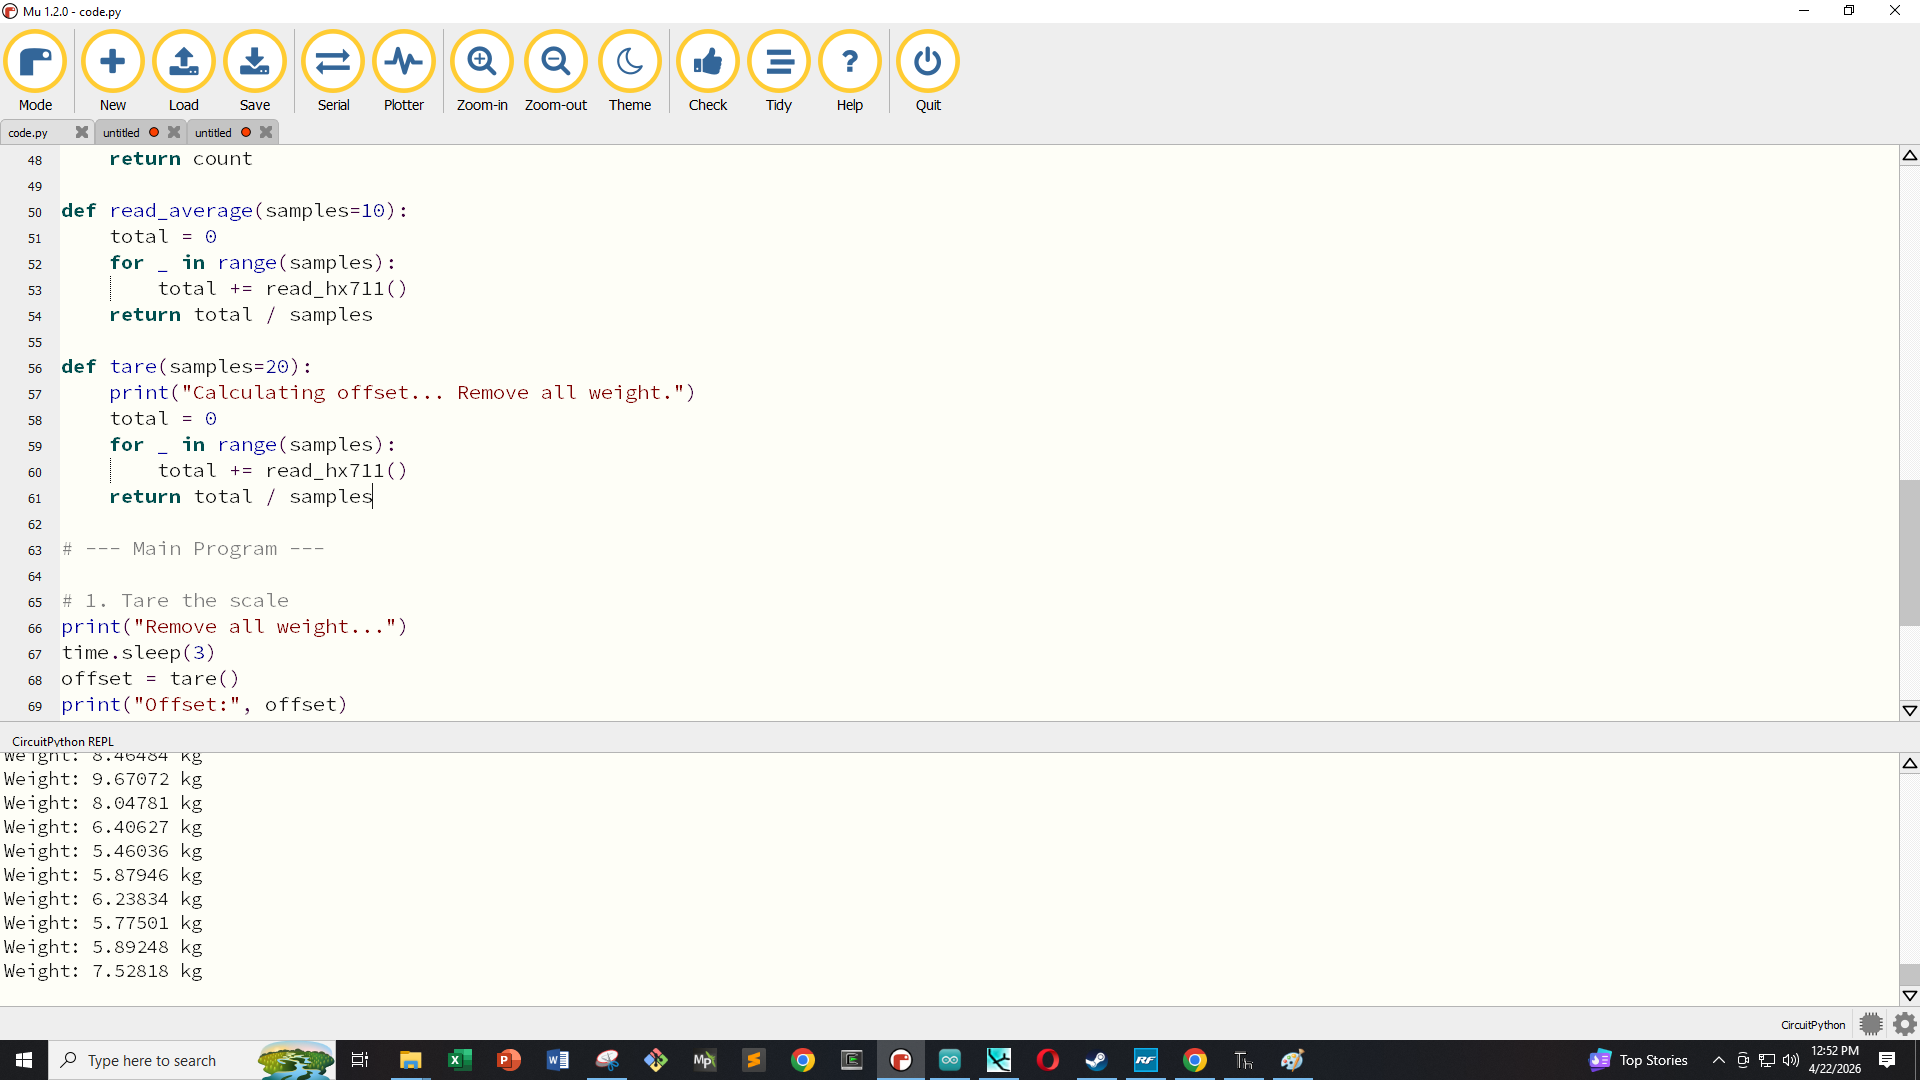
The photo above shows the example output of the load cell in kg by applying a load to the strain gauge. Using this simple script it is easy to weigh certain objects and get the value from the load cell. Notice however, that on line 73 at the time of this writing, the scale value is set to 12,000. That value will need to be adjusted based on your own calibration measurements which is left as an assignment to the reader.