Section 22.2 Arduino Wiring and Software
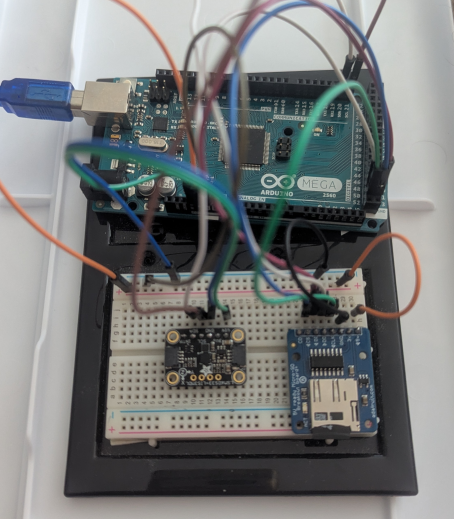
Wiring this to the Arduino requires the same setup as the CPX/CPB and also uses I2C. From the Arduino to the accelerometer, the 3.3V pin runs to VIN, GND to GND, SDA to SDA and SCL to SCL. This is shown in the figure below. Note that the SD card breakout board from Chapter 11 is also used in this example to showcase how easy it is to send accelerometer data to an SD card
Moving on to software, the .ino file for both the accelerometer by itself and the accelerometer writing to an SD card are both on Github. For both of the versions of the code you need to install some libraries. You’ll notice that at the top of the code there is a #include statement which adds a specific library.
#include <Adafruit_LSM6DS33.h>
Adafruit_LSM6DS33 lsm6ds33;
In this case you need the Adafruit_LSM6DS33 library which also requires other libraries in addition to that single #include call. Also, since the libraries are from Adafruit rather than Arduino you need to navigate to Github and download a few zip libraries. The list of libraries you need and links to those websites are shown below
Once you have the zip folders downloaded you need to navigate to Sketch>Include Library>Add .ZIP Library... and then add the ZIP file you just downloaded. This is different than adding a library directly from the Arduino website as is done for the SD library in Chapter 11. Once you’ve got the code downloaded and the libraries installed you should be able to compile without seeing any errors. After uploading the code the serial monitor should produce something similar to the figure below.

In the figure above, the sensor is outputtting temperature, acceleration x,y and z as well as the angular velocity along the x,y, and z axes. If you then compile the code which contains the SD card setup and writing you’ll be able to write the data to an external SD card which would be super helpful for a standalone project. Again setting up the SD card is done in Chapter 11
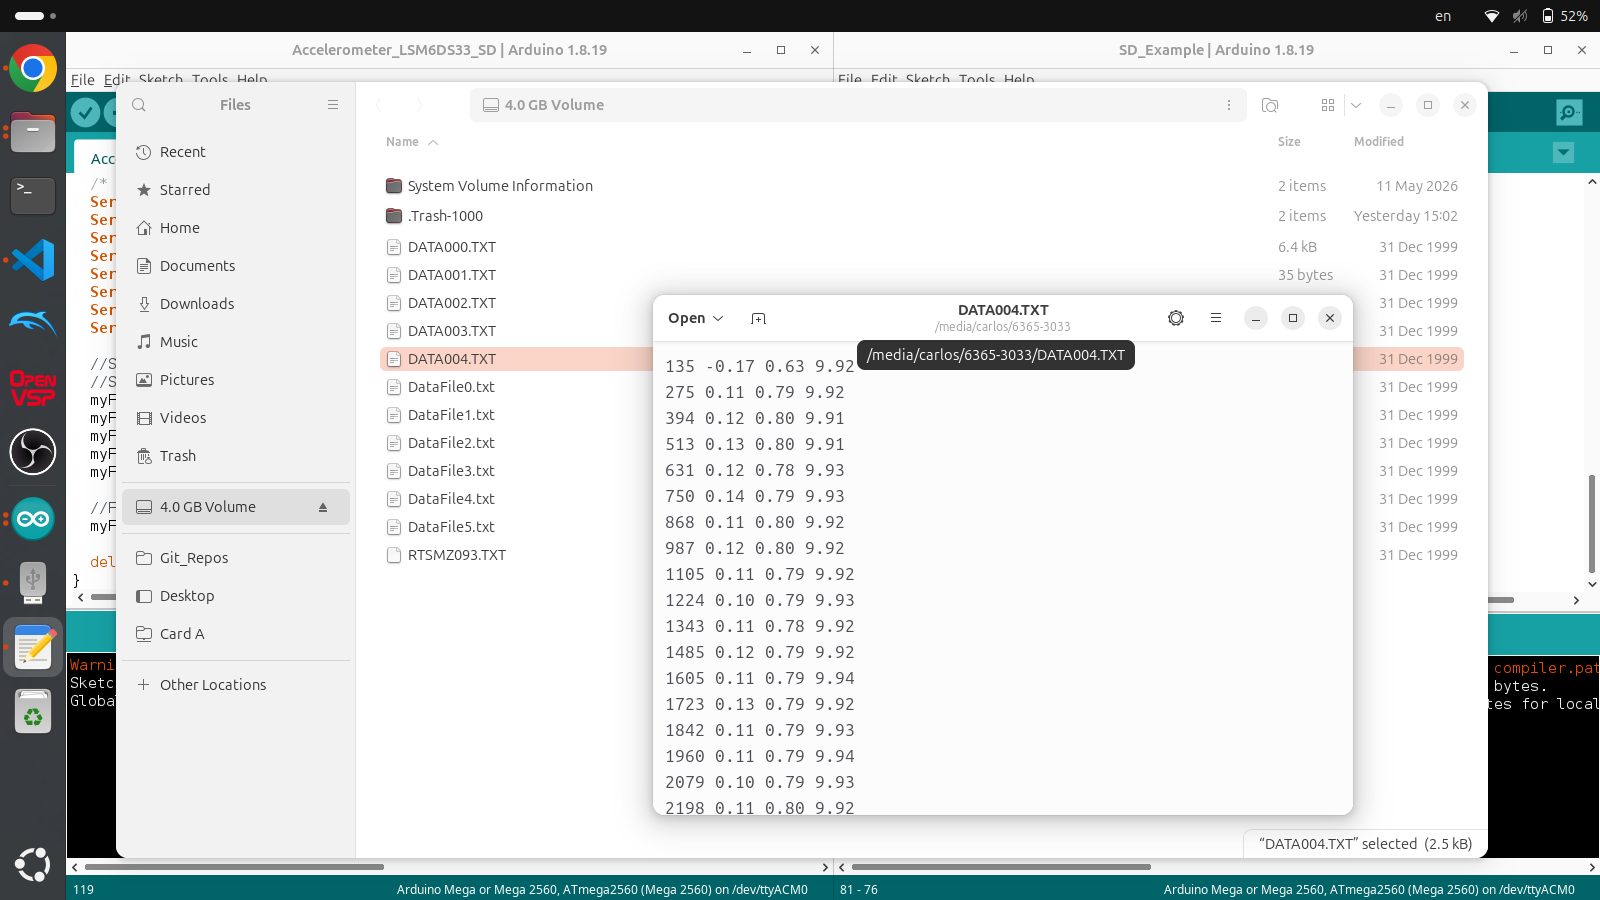
In the figure above, the code only writes the millis timer and acceleration data to the SD card but it would be very simple to add temperature and angular velocity to the code.
