Section 9.3 Method 2 - Automatically Populate a Spreadsheet
The downside with the above method of course is if you have a ton of data to record you could lose the data or run into a massive copy and paste issue. The second option is to use this module called keyboard which takes control of your keyboard on your desktop computer and actively types your data into a spreadsheet. The code is very extensive but I’ll include the simple one here so we can discuss it. Below are the first 30 lines of code. The first 6 lines of code are just comments since I heavily adopted this code from the Adafruit Learn System[32]. My version of this code can be found on my Github [33]. Lines 8 - 14 are import commands as we’ve seen previously. The regular import modules board, time and digitalio are imported but we are also importing the Keyboard module so that the CPX can takeover our keyboard. In order to import that module properly you need to install modules onto you lib folder (See Chapter 7) [30]. Lines 16-22 create two buttons. First we create buttonA attached to pin D4 and then a switch attached to pin D7. If you look on the CPX there is a switch labeled D7. Before you copy this code onto the CPX make sure you move the switch towards the ear looking symbol. Lines 26-28 created the keyboard object. We are going to call it layout for this example code.
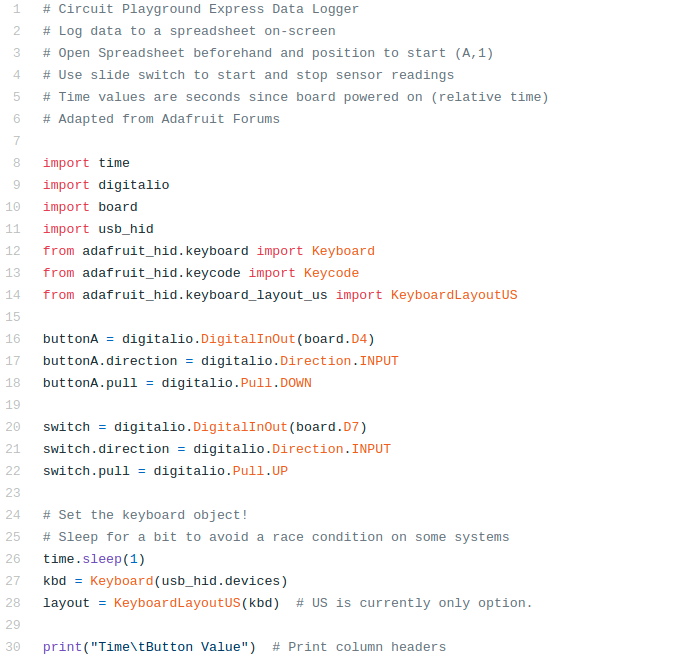
The next 30 lines are shown below. Lines 32-35 define a function. Functions in CircuitPython have a pretty standard structure. The keyword def is used to denote that the next line is a definition for a function. The name of the function is slow_write(). The input to the function is string which ironically enough is a string object. Line 33-35 define what the function does. Line 33 sets up a for loop where the code loops through each character in the string. Everytime it gets to a new character it will use your keyboard to type that character using the layout.write(c) command. The time.sleep(0.02) is just to slow down the keyboard so your computer can keep up. That function is defined above the standard while True: statement on line 37 but is called on line 42. You’ll see there is a slow_write(output) on line 42. In this case output is a string and it’s sent to the function slow_write(). So in this case we have a function that can write a string so we just need to take data and then write it using our keyboard. Line 38 is an if statement that will only be true if the switch on pin D7 is pushed towards the music note on the CPX. If the switch is not thrown the code will move to the else statement on line 52 and tell the user that you need to flip the switch. If the switch is thrown line 40 will take data for us. First it will record the time.monotonic() and store it as a floating point number using the %0.1f designation which means that it will store 1 decimal as a %floating point number for f.
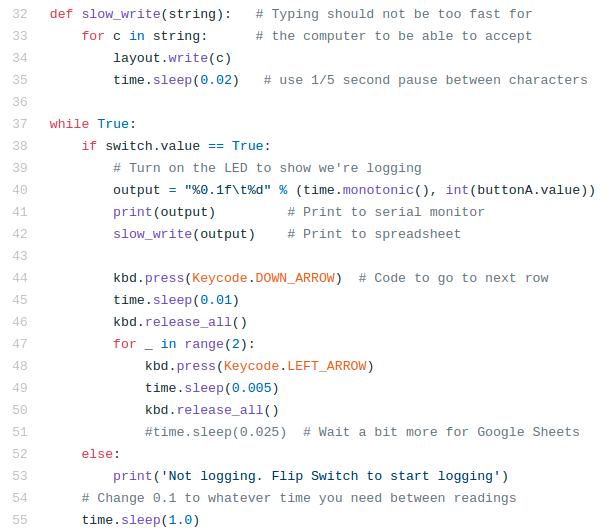
The second number in the string is an integer or a base 10 (decimal) integer designated by the %d part of the format. The integer is int(buttonA.value). You’ll see a \t in between the formatted numbers which is a tab. The tab is there to tab between cells in a spreadsheet. Line 41 will print the output string to the Serial monitor and it will also type the contents of the string. Very important here. When you flip the switch on the CPX your keyboard will start typing in whatever active window is selected. If you don’t have a spreadsheet opened and active (selected), the keyboard will just begin typing in whatever window is open. Make sure you have a spreadsheet program open and ready to go. Lines 44-51 tell the keyboard to hit the DOWN_ARROW on your keyboard to move to the next row and the LEFT_ARROW twice to move back to the first column. Line 55 is a sleep to only log data once a second. I ran this code for a bit and had it type into LibreOffice Calc which is a free spreadsheet program. Google Sheets or Microsoft Excel will also work just fine.
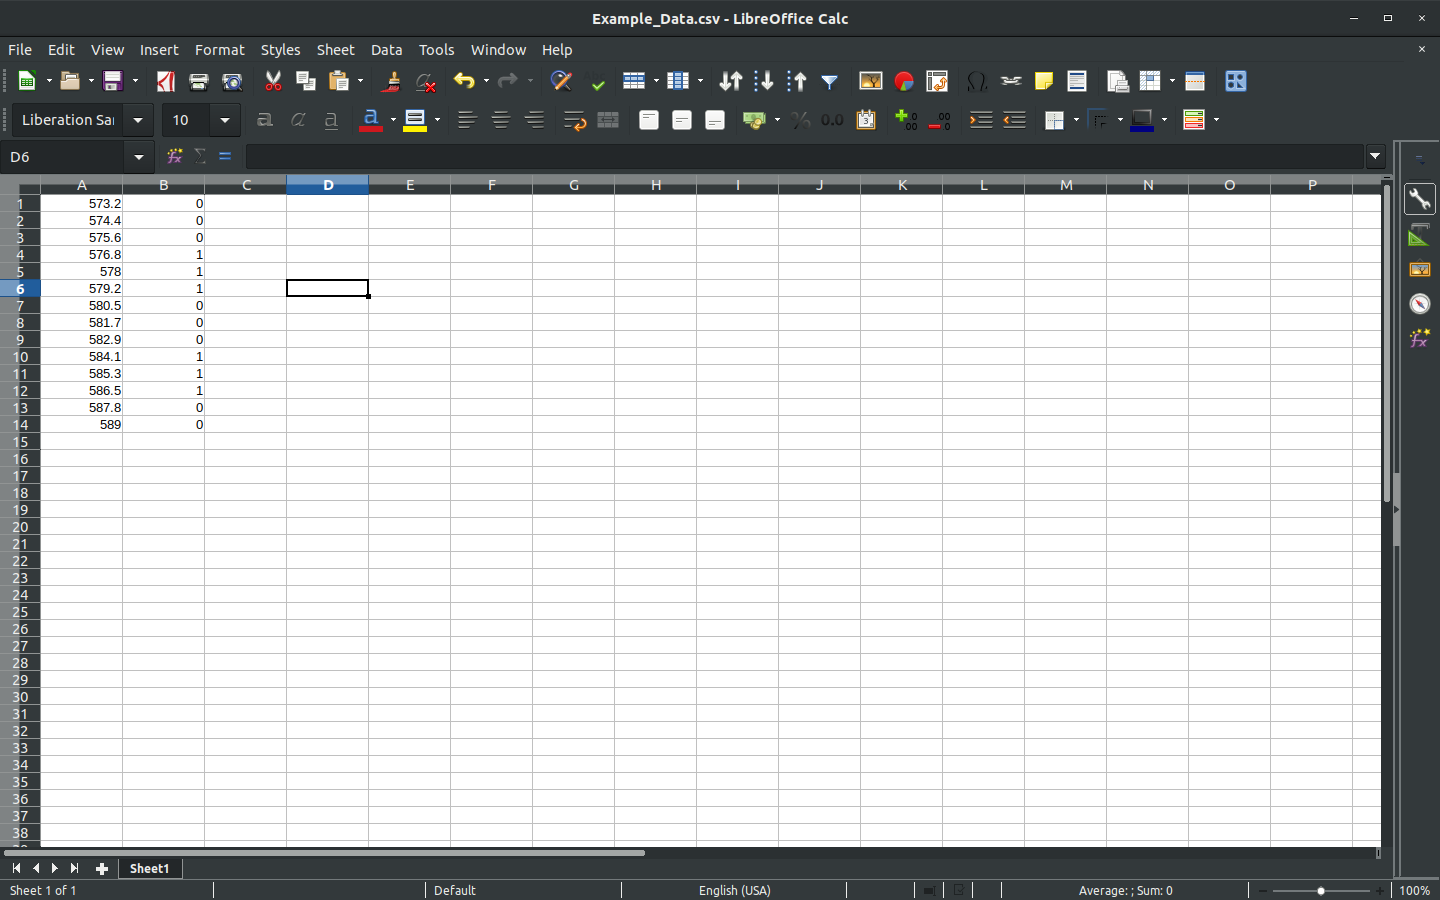
You’ll see that the first column is time with 1 decimal point and the second column is the button press values. At this point you must click Save As... and save the document as a CSV which stands for Comma Separated Value. Once you have the file saved you can proceed to plotting on your Desktop.
