Section 11.2 Setting up the Arduino
There is no setup for the Arduino other than making sure the SD card is formatted to FAT32 and that the breakout board is soldered properly to header pins. The wiring for an Arduino also requires 5 wires that I recommend doing while the system is powered off.
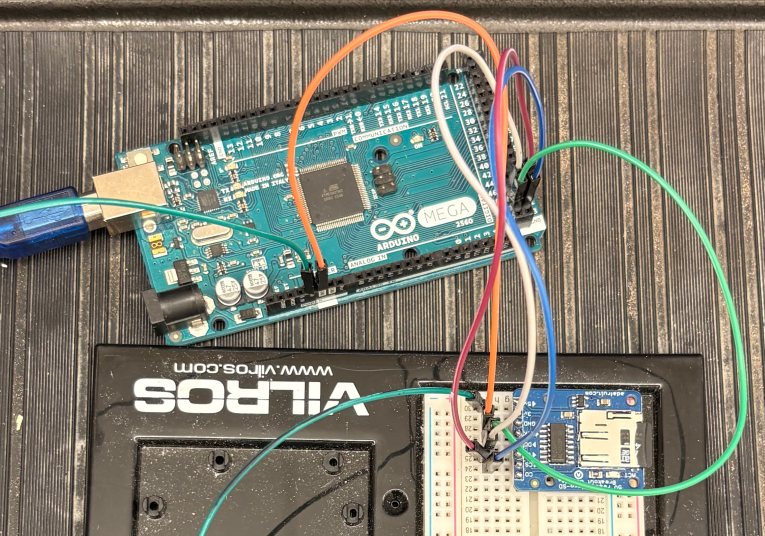
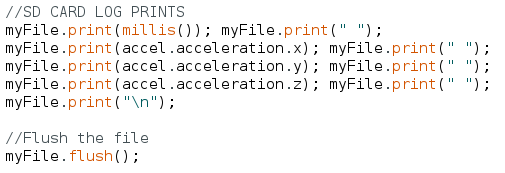
In the figure above the dark green male-male wire goes from 5V to 5V, the orange male-male wire goes from GND to GND, the light green wire goes from 52 to CLK, the white wire goes from 50 to DO, the purple male-male wire goes from 51 to DI and the blue male-male wire goes from 53 to CS. The software to get this to work is on Github as usual and a snippet is shown in the figure below.
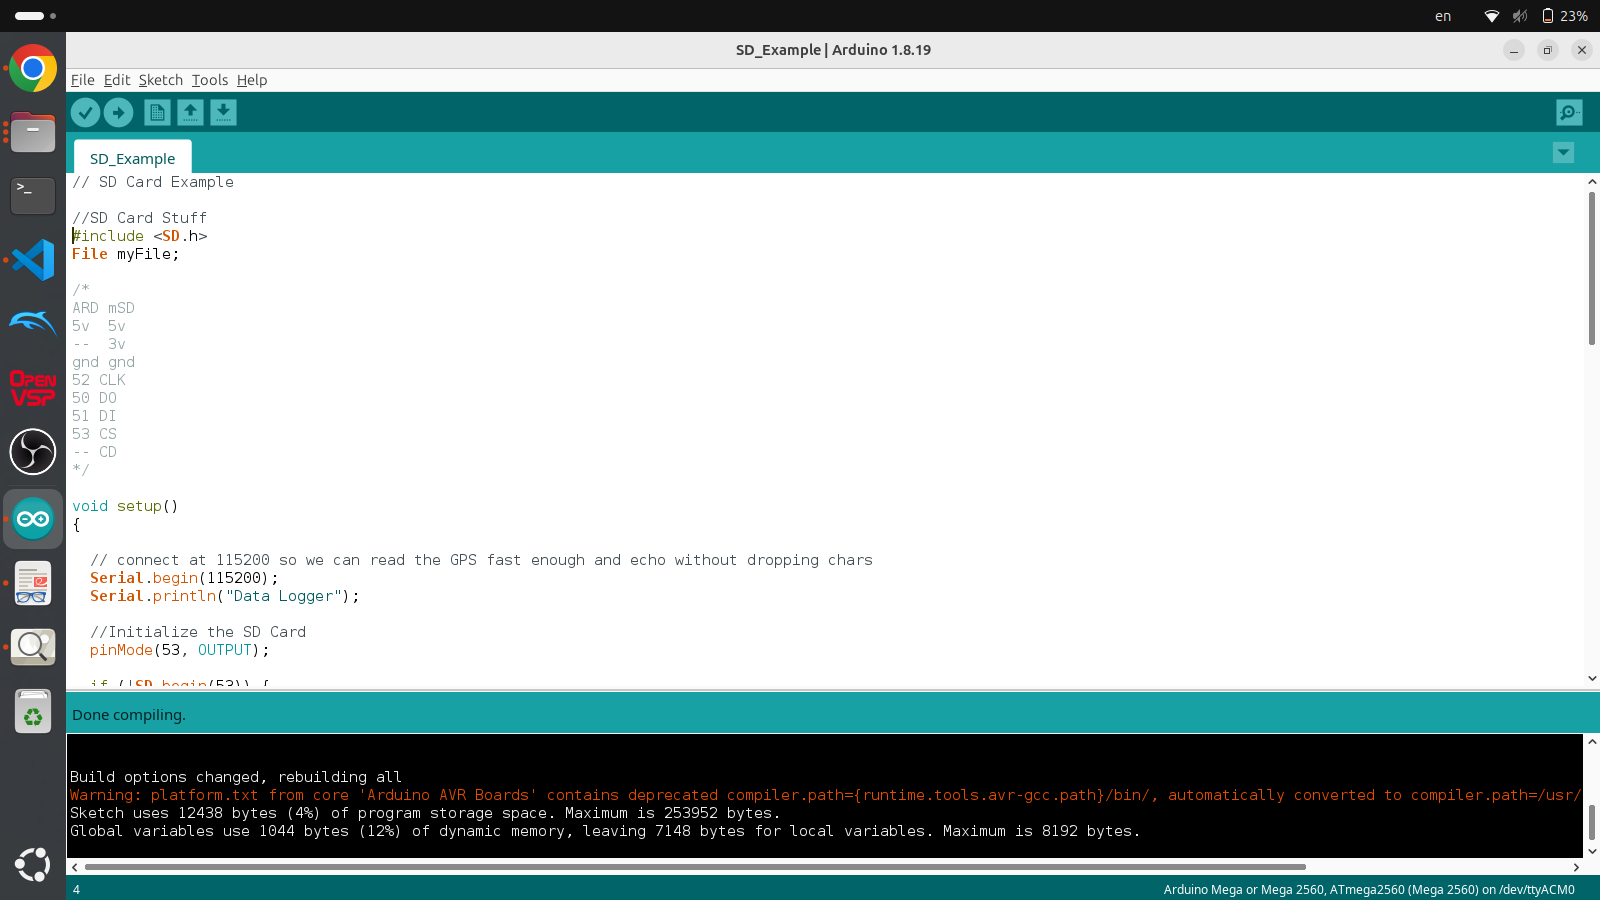
You’ll notice in this code that there is a #include <SD.h> line of code which imports the SD header file. In C++ and other compilation languages you have a .cpp or .c file which has all the code necessary to run somthing and a .h file which declares all the variables. In Python you don’t have to declare a variable the language figures it out on its own but in Arduino you must tell the computer what type of variable you are using. In this case if you need an extra module you don’t import it you include it. To include extra module you must click Sketch>Include Library>Manage Libraries....
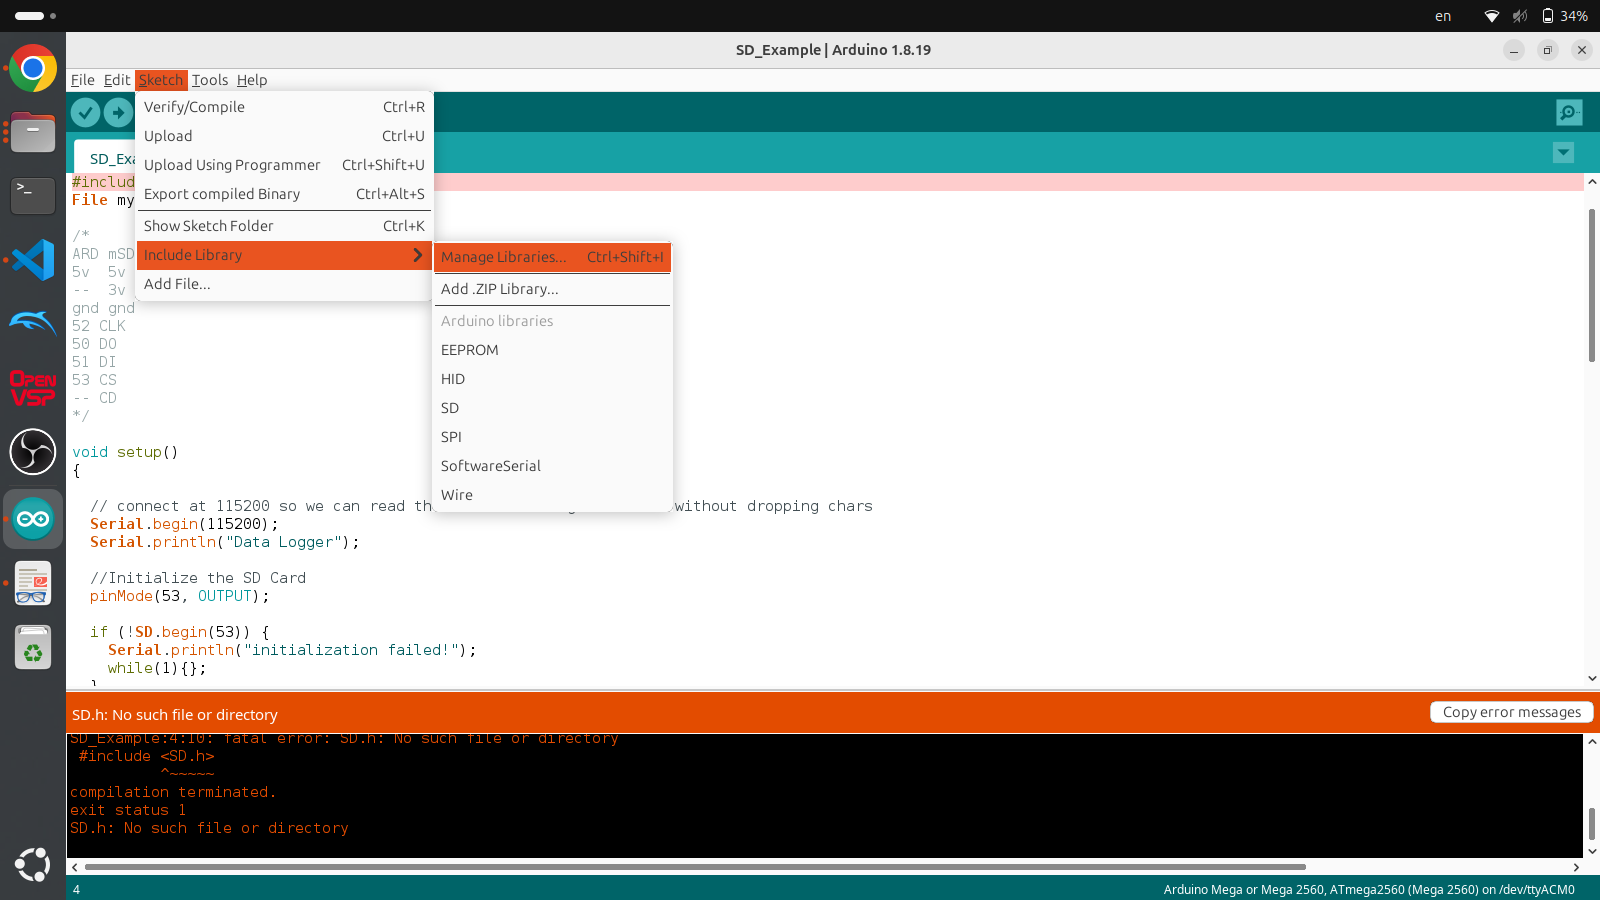
After clicking that a new window will pop up where you can then search for "SD.h" and after scrolling down a bit you’ll find the SD library to install. After installing it you will be able to Compile the software without any errors and Upload the script to your Arduino. The Serial monitor will work with this script as Serial.begin(115200) is in the setup routine and there are many Serial.print calls in the loop routine. If you open the serial monitor you should see the millis() time printed on the screen provided you set the baud rate to 115200.
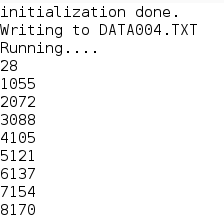
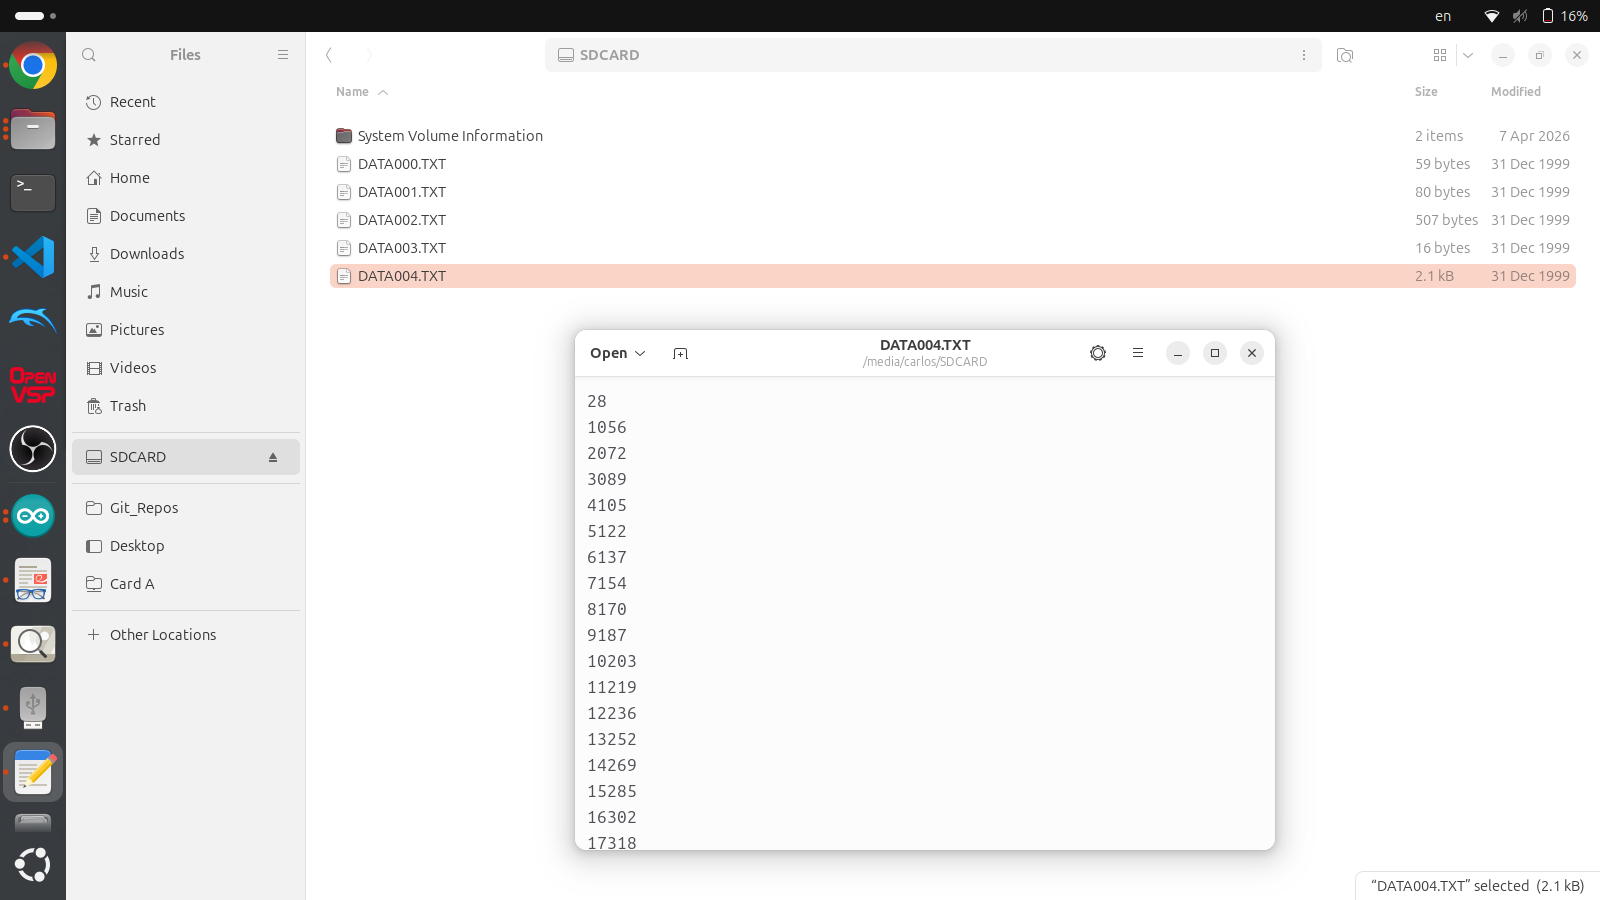
In this case the serial monitor also states that is is writing the DATA004.TXT. Everytime the code runs it will look for a new file that doesn’t exist so that everytime you boot up the code it will create a new file. It ends up creating a lot of files but at least your data isn’t overwritten. It also only outputs the internal timer because the Arduino does not have a built-in button but once we do other labs with pressure and acceleration it will be easy to send that data to the SD card as is shown in the code snippet below.
The code to get an external accelerometer to work on an Arduino is dicussed in more detail in Chapter 22. Still, for the simple example of just writing time to an SD card, by simply unplugging the Arduino and placing the SD card into an SD card reader will show all the files on your laptop and opening the txt file itself will show all the data you just took.
At this point it is identical to Chapter 9 to plot the data in whatever plotting environment you like.
